Theme Customization by Example
New to Plone? Eager to customize Plone look and feel? OK, be sure you get prepared and the following instructions will guide you to build a theme project.
Prerequisites
The target audience here are people from PHP/ASP world, or even visual designers working only with static HTML/CSS. So you are expected to get these ready.
- Basic knowledge about HTML/CSS: good resources can be found at W3Schools.
- Text Editor for HTML/CSS: those guide you to any line in the file make good ones.
- Inspector for HTML/CSS: Chrome or Firefox/Firebug are good tools.
- A running Plone instance accessible via Zope Management Interface with admin permission.
Starting with Static HTML
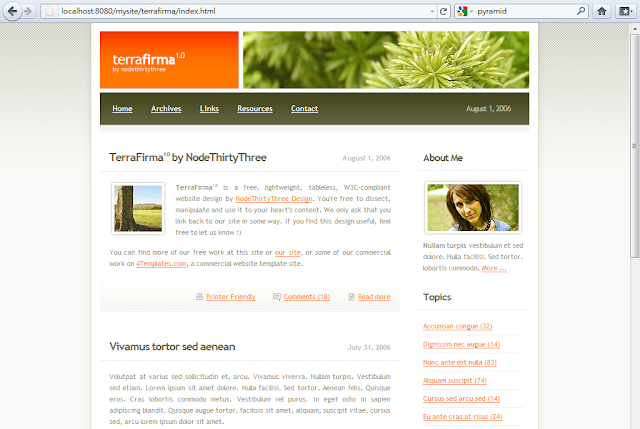
Simply static HTML/CSS does not meet requirements for modern web sites, but definitely helps the communication among project participants. Let's get one from Open Source Web Design. TerraFirma is used here as example.
terrafirma
├── default.css
├── images
│   ├── a10.jpg
│   ├── a16.gif
│   ├── a18.gif
│   ├── a1.gif
│   ├── a22.gif
│   ├── a26.gif
│   ├── a33.gif
│   ├── a36.gif
│   ├── a38.gif
│   ├── a41.gif
│   ├── a47.gif
│   ├── a50.gif
│   ├── a8.gif
│   ├── abg.gif
│   ├── pic1.jpg
│   ├── pic2.jpg
│   ├── spacer.gif
│   └── upbg.gif
├── index.html
└── readme.txt

1 directory, 21 files
TerraFirma contains one HTML and one CSS, plus one 'images' folder. We can serve this visual works for Plone through the web (TTW) or through the filesystem (TTF). Let's begin through the web, which seems fitting into most visual designers' working behavior.
Adding HTML/CSS through the web
Through the web (TTW) here means through the Zope Management Interface (ZMI).
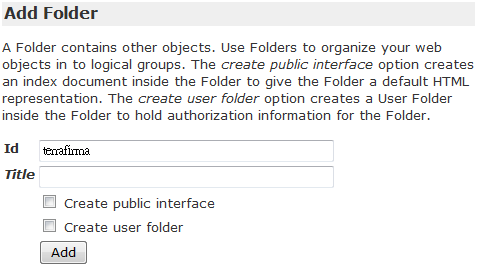
- Add a Folder to host files from terrafirma.zip.
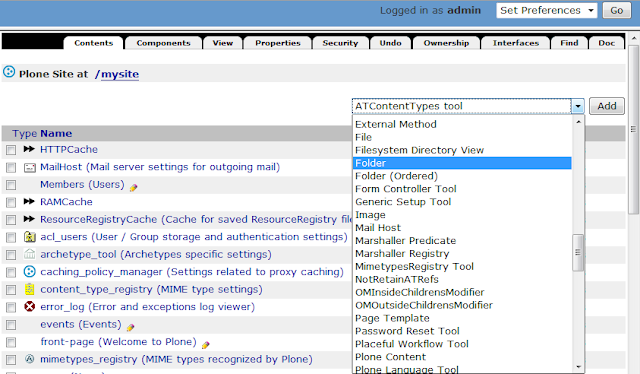
- Folder ID is terrafirma in our case.
- Create Page Template for each HTML file: its ID is index.html, same with the one from terrafirma.zip.
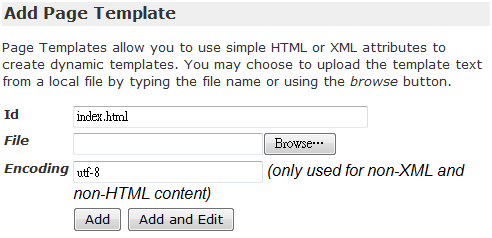
- Test the Page Template to Make Sure Everything's OK: in case of any error with hinted line, check it with your text editor.
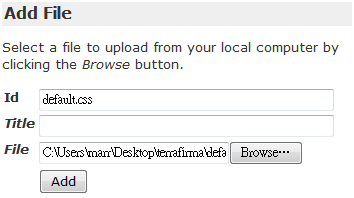
- Create File for each CSS file: its ID is default.css, same with the one from terrafirma.zip.
- Create Image for each JPG/GIF file

Seeing HTML/CSS in Action
Open http://localhost:8080/mysite/terrafirma/index.html in your browser to see the result.
Looks good, but how to work with stock Plone functionality, for example, search box?
Well, the above step is for static HTML files, giving you basic concept that HTML can serve as simplest Page Template. For dynamic page outputs and functionality, let's move on to Plone layout and its rendering mechanism.
Plone Layout
Plone 4 uses SunBurst as default theme. Its theme layout contains basically four parts:
- Header
- Main Content
- Left / Right Sidebar
- Footer

In our case, each part is controlled and rendered by a visual container, called ViewletManager. For example, Header (part 1) is rendered by ViewletManager plone.portaltop. Each ViewletManager organizes several Viewlets. Each Viewlet serves as functional or visual unit. Logo, searchbox, personal_bar, global_sections are examples of Viewlets.

Managing ViewletManagers and Viewlets
You can see the whole picture by appending @@manage-viewlets to URL, for example http://localhost:8080/mysite/@@manage-viewlets will show all ViewletManagers and their Viewlets at site root.

Note that Viewlets are organized in order by ViewletManagers. For example, plone.searchbox Viewlet is the 4th visual component (indexed with 3) of plone.portalheader ViewletManager. By clicking 'Hide / Show' of each Viewlet, you can make this visual unit invisible to site visitors.
Now compare with the TerraFirma layout, you can hide unused Viewlets and arrange their orders to quickly align the visual layout. In our case, searchbox is not used, and should not show up.

Well, there are more about Viewlets, but we are not hurried into the details. Let's first try custom CSS with default theme, that might quickly bring results close to what you need.
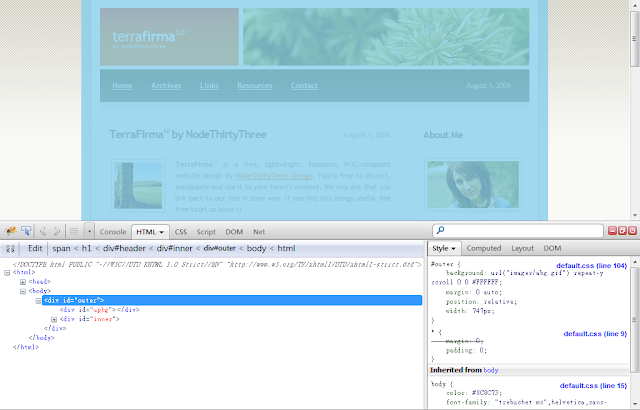
Customizing Fixed-Width Layout
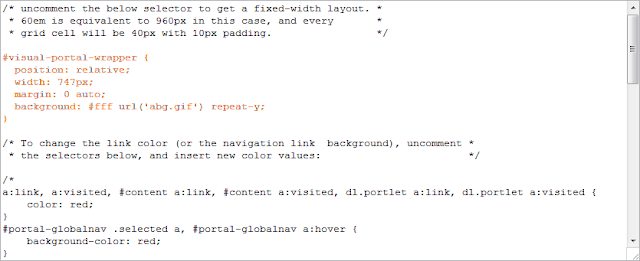
It's good idea to begin your customization from outer to inner. With firebug, you can identify CSS id outer (line 104 in default.css) set a fixed-width of 747px. Its equivalent setting in Plone is CSS id visual-portal-wrapper.
Go ZMI mysite/portal_skins/sunburst_styles and look for ploneCustom.css, where we begin our CSS customization.
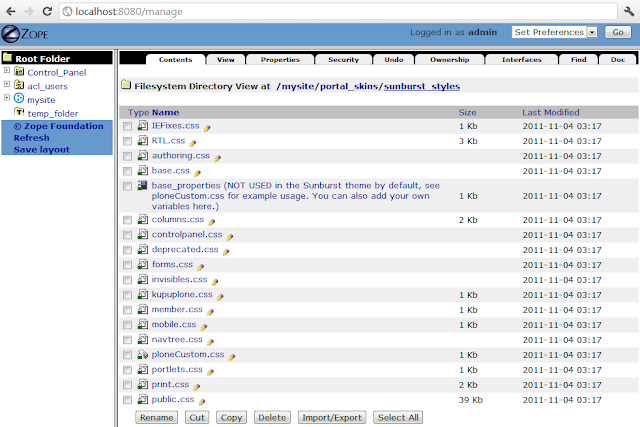
Click Customize button to make a copy of ploneCustom.css in custom folder.
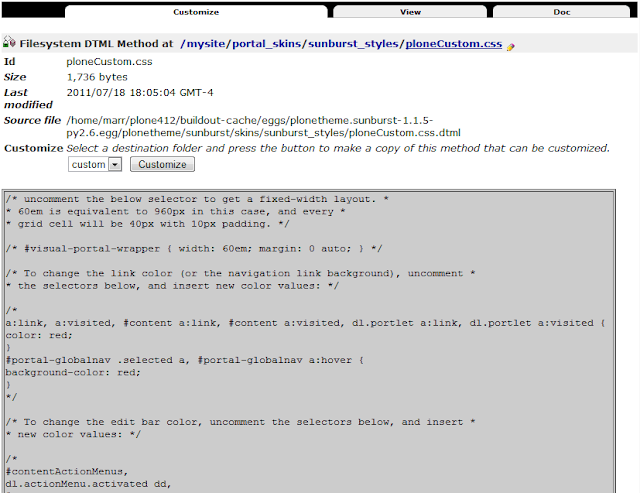
Note that the path indicates you are editing a DTML Method at custom folder.
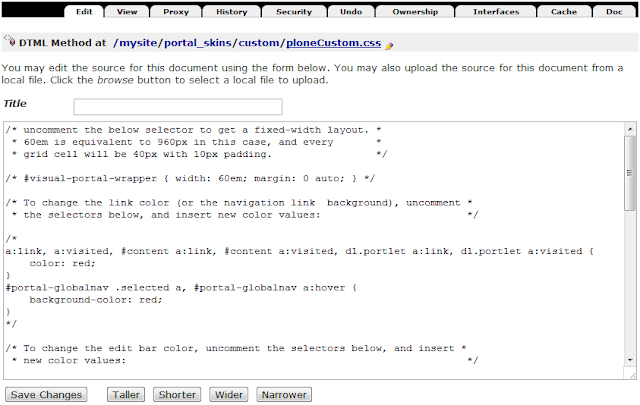
Save the updates.
Reset CSS Customization
After setting CSS float customization, the page display often gets messed up. One trick is to add <div class="visualClear"><!-- --></div> to reset them.
plone.path_bar Invisible for Home Page
又稱為 breadcrumb,在 plone.app.layout/viewlets/common.py 找 PathBarViewlet 還有 path_bar.pt 檔案。
Scrollbar Tip
http://plone.293351.n2.nabble.com/Plone4-Classic-Plone-Theme-Tags-Scrollbar-not-showing-tp7237786p7237786.html
https://github.com/collective/collective.easyslideshow/blob/master/src/collective/easyslideshow/README.txt